Boxcryptor and Whisply – Guide for Mac
With Whisply we integrated our second product into Boxcryptor. From now on you can share files with non-Boxcryptor users right from your Boxcryptor drive. This guide shows you how to get started with our new integration. The Whisply integration currently supports Dropbox, OneDrive and Google Drive. We are planning to support more cloud storage providers in the future, but we can't tell you when exactly. If you think that your provider should be added, simply drop our support agents a feature request.
To send a file with Whisply you simply have to follow these 5 steps:
1. Select the file you want to share

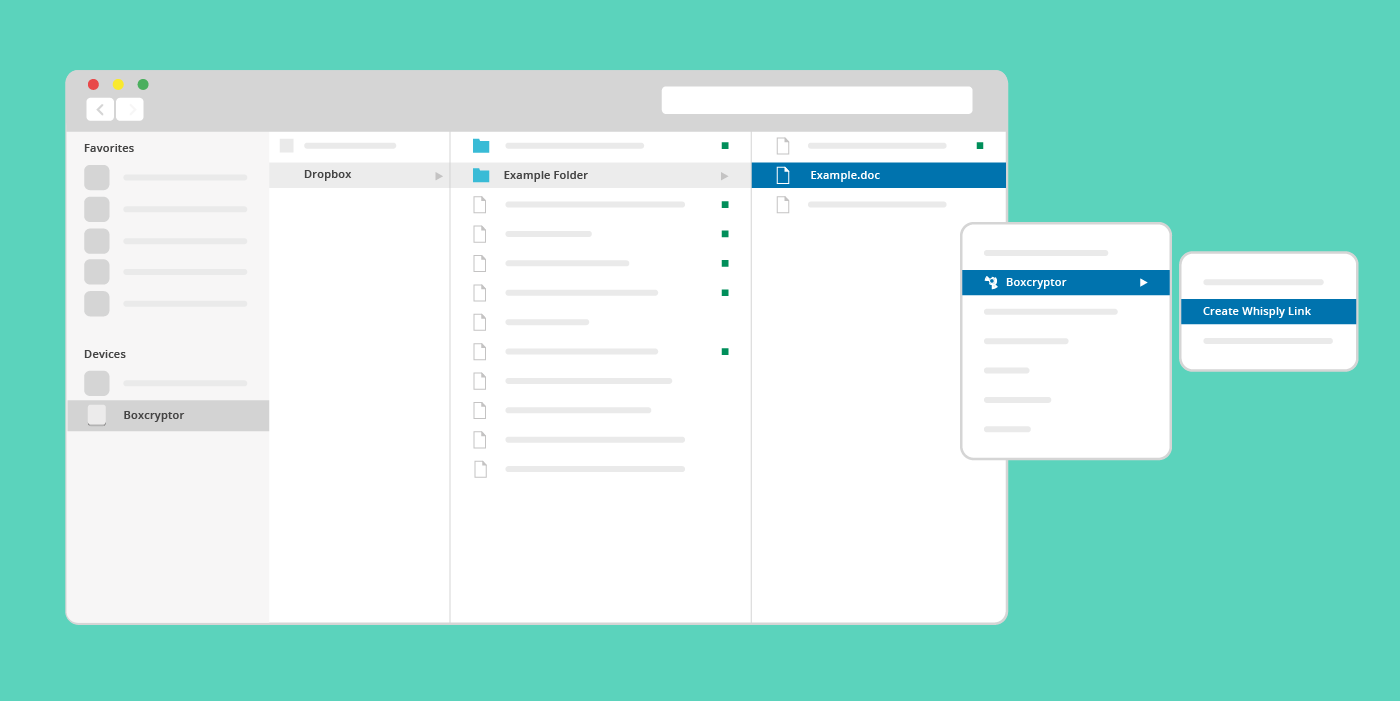
Open your Boxcryptor Drive which is located in your user's home folder (e.g. /Users/johndoe/Boxcryptor). Browse to the file you want to share via secure Whisply link.

Right click on the file to open the context menu. Hover over the entry ‘Boxcryptor’ to see the available Boxcryptor options and select the option "Create Whisply link".
2. Link your cloud storage provider

You'll be asked to enter the credentials for Dropbox, OneDrive, or Google Drive. After that you need to confirm the connection between Boxcryptor and your cloud storage provider. It is important that you link the exact account which you use with Boxcryptor. Otherwise it won't work.
3. Determine your sharing options

Once you successfully connected your cloud storage provider the browser opens and navigates to our web application Whisply. If you're using Whisply with a Boxcryptor Unlimited Personal or Business license you can determine your sharing options for the file. You can set a customized expiry date for the download link, or toggle the option that the file can only be downloaded once.
4. Choose the security level

In the next step you can choose if you want to add additional access protection by requiring a randomly generated PIN or a custom password. If you chose Link & Password you are prompted to set your custom password.
5. Send the download link

Now Whisply shows you the download link of the file you want to share. Depending on the security level you chose in the step before, Whisply displays the random PIN or the custom password in the final step.
6. Receiver: Downloading the file

The person who receives the link will be asked to enter the PIN or Password if you have chosen one of these two security levels during the sending process.
The great thing about the Whisply link is: When you edit the sent file, those changes will be updated for the receiver as well. The receiver of the link will have the most recent version of the file when downloading it again later.


